




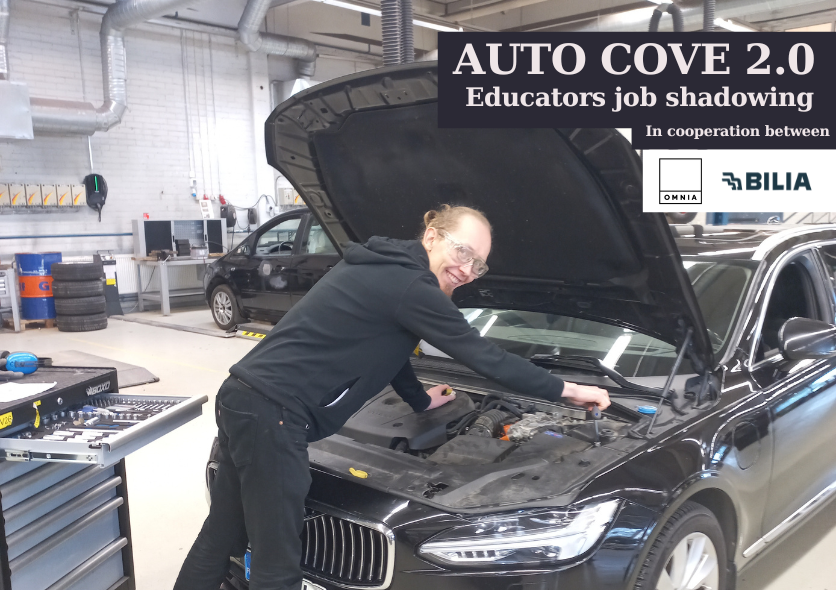
Automotive Engineering teachers Jan Borg and Juha Hämäläinen had the opportunity to spend a few days on a job shadowing period at Bilia OY as part of their Auto Cove 2.0 project development work.
Below, Omnia’ s automotive teachers Jan Borg and Juha Hämäläinen describe, what they learned during their teacher job shadowing period at Bilia Oy. Jan and Juha are belonging to Omnia’s the development team of the Auto Cove 2.0 project funded by the European Commission. The project involves the development of a total of 13 technical study modules in collaboration with European partners for automotive mechanic and automotive engineering students.
Bilia Oy, as a company partner of the Auto Cove 2.0 project, made the job shadowing period possible for the teachers. The experience from the period was considered so useful that there are plans to repeat it, perhaps by the end of this year. Teachers utilize, what they learned during the job shadowing period in the project’s development work and when piloting tasks produced in the project with their students at Omnia.
Jan Borg:
“During my job shadowing at Bilia, I had the opportunity to work in the diagnostics mechanics team. In this small team of three, we solved technical problems with cars that do not fit into the daily schedule of regular service mechanics. Diagnostics mechanics tackle faults in new cars that may not yet have been experienced globally. A diagnostics mechanic’s daily schedule typically consists of one or at most a few scheduled jobs, where they diagnose the issue, order parts, and carry out repairs once the ordered parts have arrived. When one of the diagnostic mechanics completes their scheduled tasks, they request additional work brought in by the team leader via a tow truck. Warranty jobs brought in by tow truck arrive unexpectedly, and they are started once the scheduled jobs are completed.
On the first day of my job shadowing period, I had the opportunity to observe a warranty repair of a car brought in by a tow truck. According to the customer, their electric car couldn’t be quick charged. Despite trying different fast-charging stations, the charging wouldn’t start. Another mechanic, who worked as a regular service mechanic, had initiated the diagnosis. A similar fault had occurred in another car, which facilitated the diagnosis of this car. The diagnosing mechanic found the fault by measuring the insulation resistance between the car’s fast-charging socket and the body. As the insulation resistance was too low and varied when the cable between the fast-charging socket and the high-voltage battery was moved, the mechanic discovered that the fault was in the high-voltage battery’s contactor unit. The replacement work for the contactor unit was assigned to the diagnostics mechanics team, and I had the opportunity to observe one of them perform this replacement work. The contactor unit is located on top of the high-voltage battery, so the replacement work requires removing the high-voltage battery from the car’s underside.

Removing the battery starts by de-energizing the car. The service disconnected unit, located in a well-protected place under the rear seat of the passenger compartment, is removed to safely disconnect the several hundred kilograms heavy battery. The battery is lowered from the car using a lift. It is attached with dozens of bolts, and the manufacturer’s instructions must be strictly followed.
The replacement work for the contactor unit itself does not involve working with high voltage, but the mechanic I worked with requested that I only observe as he carried out the actual replacement work. When removing the contactor unit, it was necessary to disassemble connections inside protective covers, and it was particularly interesting to see what had caused the fault in the quick charging. The fault was caused by the attachment of the cable between the car’s fast-charging socket and the contactor unit. The sharp edge of the connection piece attached to the cable by crimping caused scratches in the insulation layer. If the insulation layer is breached, there is a risk of the voltage from the battery flowing to the car’s body, triggering the car’s power management system to prevent fast charging.
The sharp edges of the connection piece were rounded and covered with heat shrink tubing to prevent recurrence of the same fault. A new contactor unit was installed in the battery, and the cables were reattached. The battery was lifted back into the car’s underside, and the car was finally energized. The work was very interesting because it was the first time, I had seen the high-voltage battery being removed from a car. I also had an opportunity to see the structure of the electric car’s battery and contactor unit, as well as the connections used in them.
In another job, the customer described that their car’s reverse camera was not working. The car had been to the repair shop earlier for the same fault, and a camera had been replaced then. The camera replacement had helped for a while, but the fault had returned. We started by examining stored fault codes. The fault memory indicated a fault in the camera’s power circuit, but it was not active. Based on the fault code, we started by removing the tailgate opening handle to which the camera is attached. We noticed that the plug of the microswitch in the opening handle was oxidized, indicating that the connections in the wiring harness were not completely watertight. For this reason, we removed the entire rear bumper from the car, to which the camera with its wiring harness is attached, to inspect the camera’s entire wiring harness and its connectors. It turned out that water had also entered the camera’s connector, and this was found to have caused the improper functioning of the connection between the camera and the image processing control unit. We replaced the wiring harness, which includes new connectors and seals. We also replaced the opening handle, whose connector had oxidized.

The reverse camera might not have needed replacement, but in a warranty repair, we didn’t want to take the risk of the camera being damaged when water had entered the connector. Camera replacement requires calibration, which was done by driving straight at a certain speed. It was interesting to see how the parking lines in the car’s “360-degree” camera straightened out the longer the calibration drive was performed.
This job was directly related to Auto Cove 2.0 project development work that we are doing. Here, parts belonging to the ADAS system were replaced and then dynamic calibration was performed. We intend to develop and produce ADAS related tasks for students in Auto Cove project.
Many thanks to Bilia OY and its staff for the warm welcome.
Thanks also to the Auto Cove project for enabling this job shadowing period and the valuable experience it brought of what is required in today’s working life.”
Juha Hämäläinen:
“The teacher job shadowing period at Bilia Olari was a great and educational experience. The staff at Bilia welcomed the teachers very well, and we received opportunity to familiarize ourselves extensively with the tasks and daily routines of the automotive mechanics at Bilia Olari. The tasks included regular and efficient team meetings on daily current issues and internal information sharing.
I had opportunity to work alongside Volvo’s own mechanics to update and improve my skills in customer service situations and with challenging fault diagnosis. For example, we diagnosed a car’s fault in a situation, where the car had been connected to the diagnostic tester only once to read the fault codes. After that, the car couldn’t be reached with the diagnostic tester anymore, and the problem turned out to be a leak from the shark fin shaped antenna on the roof, causing the roof antenna’s control unit to interfere with the car’s network communication.
We used the VIDA tester for diagnosing cars in other respects. I also received an opportunity to update the software in cars with the tester and load the program into a new control unit. We searched for a reason in a fully electric car that caused it to stop after a short drive. I learned a lot about diagnosing faults in the high voltage system. The fault codes of a hybrid car that had reduced the power of the car was due to a problem with the high-voltage battery cell module. I learned, how to prepare and perform the replacement of a high-voltage battery cell module. We used the VIDA tester to measure the target voltage of the cell module and balanced the new module to the target voltage. We lowered the high-voltage battery pack from the car and prepared it for the module replacement.

It was also great to be involved in learning about the customer service situations of a Volvo own mechanic. For example, we assisted a customer in pairing their phone with the Volvo Cars app and their new car. I noticed that automotive mechanics increasingly deal with setting up and troubleshooting car-related online and phone connections. In these situations, the own mechanic often works together with the customer.
A big thank you to the friendly and guiding staff at Bilia Olari for this opportunity to develop my skills.”
Funded by the European Union. Views and opinions expressed are however those of the author(s) only and do not necessarily reflect those of the European Union or EACEA. Neither the European Union nor the granting authority can be held responsible for them.
Prepared by:
Omnia